
Where Mercedes 190E Rust Hides: The Complete W201 Corrosion Map
The Mercedes 190E rusts predictably at six locations: the rear subframe mounting points, the rear wheel arch lips, the front and rear screen surrounds, the boot floor under the spare wheel well, the jacking points, and the front strut towers. Severity follows mileage and climate exposure. A clean rear subframe area is the strongest single indicator that a 190E has been cared for.
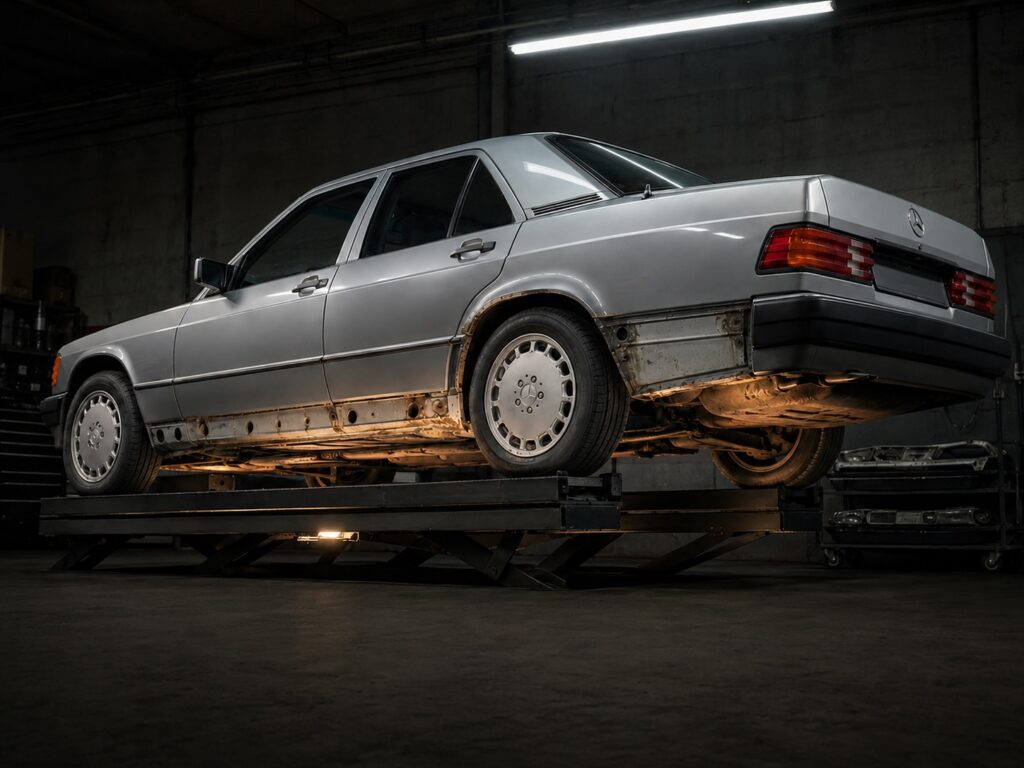
The Mercedes 190E rusts predictably at six locations: the rear subframe mounting points, the rear wheel arch lips, the front and rear screen surrounds, the boot floor under the spare wheel well, the jacking points, and the front strut towers. Severity follows mileage and climate exposure. A clean rear subframe area is the strongest single indicator that a 190E has been cared for.
The six locations, ranked by severity
The W201 was built to a corrosion-protection standard that embarrassed most of the 1980s, which is exactly why surviving examples rust in a pattern rather than everywhere at once. Galvanic protection and wax injection were thorough; the gaps in that coverage are where every 190E rots, in the same order, on every continent.
| # | Location | Severity (1–5) | Repair cost band (2026, UK) | Verdict |
|---|---|---|---|---|
| 01 | Rear subframe mounting points | 5 | £900 – £2,500 | The deal-decider |
| 02 | Front strut towers | 5 | £1,200 – £3,000+ | Rare but terminal |
| 03 | Jacking points | 4 | £400 – £900 | The skipped inspection |
| 04 | Front screen surround | 4 | £600 – £1,500 | Hidden until it isn’t |
| 05 | Rear wheel arch lips | 3 | £350 – £900 per side | Cosmetic until the seam |
| 06 | Boot floor / spare wheel well | 3 | £250 – £700 | The two-minute check |
Inspect in this order. If location 01 fails, nothing else needs checking.
Rear subframe mounting points: the deal-decider
The rear subframe carrying the W201’s five-link Raumlenker axle (the suspension that changed everything) bolts to the body at mounting points that collect three decades of road spray exactly where box sections meet. Moisture sits inside the chassis rail, and the first visible bubbling on the outside means the steel is already thin on the inside.
How to inspect: car on a lift or ramps, never just a jack. Find the four mounting areas ahead of and behind the rear axle line. Probe the surrounding box sections with a screwdriver handle. Sound steel knocks, corroded steel gives a dead thud. Surface scale that brushes off is normal at this age; flaking laminations, holes, or previous plating-over are not.
What repair costs: localised fabrication with the subframe dropped runs £900–£1,500 at a competent shop. Both rails properly reconstructed runs to £2,500. Bad news compounds here: a car rotten at the subframe mounts is statistically rotten at locations 03 and 06 too.
The signal it sends: this area only stays clean on cars that were garaged, undersealed early, or restored properly. It is the single best proxy for total-car condition, which is why our buyer’s guide builds its inspection sequence around it.
Rear wheel arch lips: outer skin vs structural
Every unrestored W201 has some arch-lip corrosion; the question is which kind. The outer arch skin folds back on itself at the lip, trapping mud thrown by the wheel. Bubbling along the visible lip is cosmetic. Annoying, repairable, priced into every honest car.
The structural version sits at the seam where the outer quarter panel meets the inner arch. Push a thumb upward under the lip: if the metal flexes or crunches, the seam is going, and repair means cutting in a repair section rather than skimming filler. £350 a side for cosmetic lip work; £900 a side for proper seam reconstruction with paint.
Cars wearing aftermarket arch trims or recently applied “arch protectors” deserve suspicion in direct proportion to how new the trims look.
Screen surrounds: seal failure as the root cause
The windscreen and rear screen sit in butyl seals that harden with age. Once the seal stops sealing, water tracks down the pillar channels and sits in the screen aperture’s lower corners. Under the trim, invisible, for years.
Front (severity 4): bubbling at the base of the A-pillars or in the scuttle corners means the screen must come out for repair, and the labour around glass-out/glass-in is what makes this expensive: £600–£1,500 including a new seal and paint. On a car with a recently replaced windscreen, ask why it was replaced, sometimes the answer is “the aperture was welded,” which is either reassuring or alarming depending on the invoice quality.
Rear (severity 3): same mechanism, easier access, and the trickle path continues into the boot floor, which is why these two locations fail together. Check the rear parcel shelf corners for water staining; it’s the interior tell for an exterior problem.
Boot floor and spare wheel well: the hidden rust signal
Lift the boot carpet and the spare wheel. Always. It takes two minutes and sellers never expect it.
The spare wheel well is the lowest point of the body’s rear structure: water from a failed rear screen seal, a leaking tail-light gasket, or a perished boot seal all ends here, under a spare wheel that’s never moved. Surface rust in the well is near-universal and treatable for under £100 in materials. Holes around the well’s drain plug or along the floor seams are the escalation. £250–£700 welded properly.
While you’re there: the chassis tag inside the boot lid should be present and legible. A missing tag on an otherwise clean car is a paperwork conversation before it’s a rust conversation (how to verify a 190E’s identity).
Jacking points: the inspection most buyers skip
The four jacking tubes take the factory jack and take the worst of the wax-coverage gaps. They corrode from the inside, the rot spreads into the sill ends, and because nobody looks at them until a tyre change, a failed jacking point is usually discovered by the jack going through it.
How to inspect: press each jacking tube and the sill steel around it with a thumb. Crusty edges, flaking, or, the classic, fresh underseal applied only around the jacking points are all fails. £400–£900 to reconstruct properly per affected corner, including sill-end fabrication.
This is also where MOT welding lives. UK cars with a history of “welding for MOT” entries were almost always welded here and at the floorpans, and the quality of that welding ranges from craftsmanship to crime. Look at it, don’t read about it.
Front strut towers: rare but terminal
The W201’s front towers were well protected and rarely fail. But when they do, the car is structurally compromised at the point that carries suspension loads into the body. Causes are long-term outdoor storage, battery-acid migration on the right-hand tower, and crash repairs that disturbed the factory seam sealer.
How to inspect: open the bonnet, look at the towers’ tops and the seams where they meet the inner wings. Bubbling paint along a seam, swelling, or, decisive, cracking around the damper mount means walk away unless the car is a Cosworth priced as a project. Repair is £1,200–£3,000+ and requires jig-level accuracy to keep the geometry honest.
This and the rear subframe mounts are the two locations from which there is no sensible return on an eight-valve car. On 16-valve money, get a marque specialist’s opinion before either walking or paying.
Repair or walk away: the thresholds
| Location | Repair | Walk away |
|---|---|---|
| Rear subframe mounts | Localised, one side, caught early | Both rails, laminating, previously plated |
| Strut towers | Surface seam bubbling only | Any structural involvement on an 8V car |
| Jacking points | One or two corners, sills sound | All four, with sill rot both ends |
| Screen surrounds | Lower-corner bubbling | Aperture rot visible with trim on |
| Arch lips | Lip-only, any extent | Quarter seam involvement both sides |
| Boot floor | Well and seams, localised | Floor rot meeting the subframe area |
The arithmetic to hold in mind: an eight-valve W201 carries a £3,500–£9,500 value ceiling, and structural rust repair starts at £900 per location. Two failed structural locations on a 2.0E is a parts car wearing number plates. The same rust on a 2.5-16 is a negotiation, because the finished car supports the bill.
How climate changes the pattern
UK and Northern Europe: the full pattern, accelerated by road salt. Subframe mounts and jacking points lead. An “always garaged” claim is testable: garaged cars show screen-surround and battery-tray corrosion but clean undersides.
US salt belt: as the UK, plus brake and fuel line corrosion that European cars rarely show. Sunbelt cars reverse the pattern. Solid underneath, cooked on top: dashboards, seals, and paint fail before steel does.
JDM imports: Japanese cars live low-mileage, inspection-disciplined lives, but coastal storage and humid summers produce a specific signature: surface corrosion across fasteners and brackets everywhere, deep rot rarely. Check our JDM-import builds for documented examples. Verify underneath anyway. “JDM” describes a market, not a guarantee.
Australia: the kindest climate for the steel, the cruellest for everything else. Australian-delivered cars are the pick of the survivor pool (the survivor class, documented).
The 20-minute underside inspection
Bring a torch, a screwdriver, gloves, and something to lie on. Phone-camera every location as you go. Photos beat memory in any negotiation.
- Minutes 0–2: boot carpet and spare out, well and tag checked.
- Minutes 2–8: car raised. Rear subframe mounts, both sides, probed not just viewed. This is the inspection’s centre of gravity.
- Minutes 8–12: jacking points and sill ends, all four, plus floorpans working front to rear.
- Minutes 12–15: arches from inside the wheel wells, peel back any loose liner and look at the seam, not just the lip.
- Minutes 15–17: engine bay, strut tower tops and seams, battery tray.
- Minutes 17–20: screen surrounds, trim edges, and the interior tells: parcel-shelf corner staining, damp carpet smell, water lines in the spare well.
Twenty minutes invested here outranks any amount of time spent admiring paint. The body decides whether a W201 is worth saving; everything mechanical is, comparatively, just shopping, the buyer’s guide covers the rest of the car once the body has earned it.
How to stop a 190E rusting once you own it
The W201’s pattern is known, so prevention is targeted rather than general.
- Cavity wax the known galleries, sills, jacking tubes, rear chassis rails, door bottoms. With a lance-applied product (Dinitrol, Bilt Hamber or equivalent) every three to four years. This is the single highest-value preventive job and costs under £100 in materials.
- Clear the drains twice a year: scuttle, sunroof (four corners), and door bottoms. Most “mystery” screen-surround and floor rust starts as a blocked drain.
- Re-seal aging screen rubbers before they leak rather than after; a seal is £80–£150, an aperture repair is ten times that.
- Wash the underside after salted-road months, paying the rear subframe area the same attention the paint gets.
- Skip the bitumen underseal. It traps moisture against steel and hides problems. Exactly why fresh underseal on a sale car is a red flag. Wax-based films stay inspectable and re-treatable.
- Document what you do. Dated photos and invoices of preventive work read as provenance at sale time, the restoration builds on our index show the standard.
Frequently asked questions
Do Mercedes 190Es rust badly? No, they rust predictably, which is better. Six primary locations, inspectable in twenty minutes with the car on a lift.
What is the most important rust check on a 190E? The rear subframe mounting points. Clean mounts correlate with a cared-for car more reliably than any other single observation.
Can you daily-drive a 190E with rust? With cosmetic rust (arch lips, boot well surface), yes. With structural rust at the subframe mounts, jacking points, or towers. Not until it’s repaired.
How much does 190E rust repair cost in 2026? Cosmetic: from £250 per location. Structural: £400–£2,500 per location at a shop that fabricates rather than plates. Full-body restoration: five figures, reserved for 16-valve cars.
Is a welded 190E worth buying? Quality decides. Documented fabrication by a known shop adds confidence; anonymous MOT-pass plating subtracts more than its repair cost.
Why is fresh underseal a red flag? Because honest sellers leave the underside legible. New black coating over everything converts the inspection from observation to faith. And faith is not a negotiating position.
Did galvanised 190Es exist? The W201 used galvanised steel in selected sections and thorough wax injection rather than the full galvanising later Mercedes adopted. Protection was exceptional for 1982. The gaps in it are precisely the six locations above.
Where do I see repaired examples done properly? The restoration-class builds on our index document chassis repair work with photos, costs, and the shops that did it.
Take this with you
Got a 190?
Submit your build and we'll feature it across our YouTube, TikTok and Instagram channels.
Start your garage →